Buy the book here: http://ceramicartsdaily.org/bookstore/ceramic-transfer-printing/
See an excerpt of the chapter 5 here
Buy the book here: http://ceramicartsdaily.org/bookstore/ceramic-transfer-printing/
See an excerpt of the chapter 5 here
CONE 5/6 RANGE
VCS Vitreous ^5/6 Engobe Base
34% Gerstley Borate
2% Custer Feldspar
20% EPK
20% Silica
5% Zircopax
19% Ball ClayMary Berringer’s ^5/6 Engobe Base
10% Frit 3124
15% Neph Sye
25% Tenn 10
25% EPK
25% SilicaDePerrot’s ^5/6 Engobe Base
30% EPK
30% KYOM4
15% Cornwall Stone
8% Silica
5% Zircopax
7% Talc
3% Whiting
5% Soda AshLoree ^5/6 Engobe Base
24% EPK
19% Silica
14% Frit 3124
24% KYOM4
14% Neph Sye
* 5% BoraxWunderlich ^5/6 Engobe Base
40% EPK
30% Silica
20% G 200Feldspar
10% Ball ClayHopper’s ^5/6 Engobe Base
15% EPK
20% Ball Clay
10% Talc
10% Frit 3110
10% Neph Sye
20% Silica
* 5% Borax
10% ZircopaxMB Vitreous White ^5/6 Engobe
50% Frit 3124
13% EPK
11% XX Saggar
14% Silica
9% G 200
3% Whiting
ADD:
11% Tin OxideTransparent Vitreous ^5/6 Engobe
10% Silica 325
20% FRIT 3134
40% Red Art
30% Neph Sye or Kona F4
12% Red Iron Oxide
This is a transparent amber engobe.MB Black Vitreous ^5/6 Engobe
23% Neph Sye
23% KYOM4
22% EPK
22% Silica
*10% Borax
ADD:
4.5% Copper Oxide
4.5% Red Iron Oxide
1.0% Cobalt OxideWayne Bates ^6 Black engobe
30% 6600 Black Mason Stain
30% 3134 Ferro Frit
40% White ball clay
Berringer Ash ^5/6 Engobe
25% KYOM4
25% Cornwall Stone
20% Unwashed wood ash
15% Frit 3134
15% Talc
FOR WHITE ADD:
7.5% Tin Oxide
FOR FLESHY TAN ADD:
1.5% Nickel Oxide
8.0% Pink stainCone 10 recipes
Randy Johnson ^10 Flashing Engobe
10% EPK
50% Grolleg
10% Neumann’s fire clay
03% Nepheline Syenite
These two posts are a compilation of ENGOBE RECIPES in a wide range of cone firings. Most engobes (with the exception of vitreous ones) are applied to greenware in various stages of dryness and fire to a dry matte finish.Vitreous engobes are combinations of clay and other materials that become tight enough on firing to become vitreous. They have very low shrinkage, mature to a dense coating over the clay body and are truly the half way point between clay and a glaze. Like a lot of commercial underglazes, they can be applied to either greenware or bisqueware.
ADDING COLORANTS:
The amount of a colorant to add is always given in percentages…
When a basic engobe recipe is given in parts, all ingredients should be combined and then weighed dry on a gram scale in order to compute the percentage of colorant to add. Multiply the percentage of each colorant ingredient called for by the total gram weight of the engobe dry base.
For instance, if your dry engobe base weighs 300 grams and you want to add 5% Cobalt Carbonate to color the engobe, multiply 300 by .05 (5%) to compute that 5% Cobalt Carbonate equals 15 grams. Then weigh out the 15 grams & add the colorant amount to the dry base ingredients. Then add these dry ingredients to water and blend to a thick creamy consistency.
Straining is usually not necessary but a good whisking makes for a creamy mix.* Borax added to an engobe recipe creates a harder surface with is less apt to smear or powder off when dry.
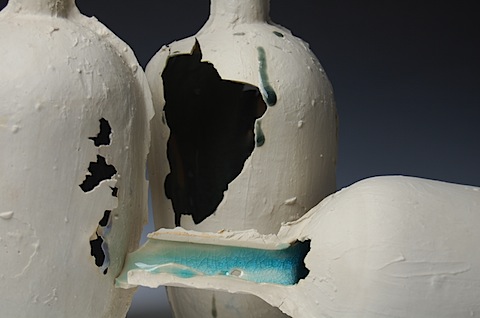
“Deliberately deformed while unmoulding and fortuitous when cooking, this production questions about the usefulness of the object, the influence of a style of production and the limits of the industry. “

Link to article here: http://mocoloco.com/art/archives/017568.php
By Nils Lou – http://digitalfire.com/4sight/education/refractory_coatings_offer_new_firing_possibilities_110.html
In this NCECA 97 Presentation Nils Lou overviews his personal experiences using RFCs over a period of 25 years.
From NCECA 97 Presentation
In 1963 I read about a refractory coating called Heat Unity Coating or HUC for short. It was mentioned in a ceramic industry publication (Ceramic Industry) claiming significant savings in fuel when used to coat boilers and furnaces, and I wrote for information. A lot of descriptive material was sent, even including information describing the patent application by W.E. Holden. I filed it and didn’t do anything with it until 1975 when I went through some old files, found the folder and decided to order if it was still available. I had just completed another Minnesota Flat Top kiln and wanted to test HUC for its touted efficiency by carefully monitoring the gas used both before and after application. I found that it was still being produced by Park Chemical in Detroit and they agreed to send me five gallons to test. Before applying the coating I fired five times, each averaging 34 to 36 gallons of LPG.
I normally fire to cone 10 in about 10 hours holding a neutral atmosphere until cone 010 and a medium reduction (OXYprobe .55) from there to maturity. The HUC directions suggested application to new brick, but I wanted to have a before and after reference and applied it to the now slightly used interior surface. UPS delivered a five gallon steel bucket, weighing forty pounds; the cost then was $85 plus shipping (now it is about $100). In their directions they suggested thinning with water and applying multiple thin coats (important). The material is a thick slurry of silicon carbide, aluminum oxide, silica sand, calcium fluoride, calcium oxide, sodium carbonate, sodium fluoride, glycerin and wetting agents. The application can be by brush, roller or spray gun. I used a large wall-paper brush and brushed it on three sides, door and roof. I thinned it to an almost paint consistency by adding water and stirring while brushing. (On subsequent kilns I discovered that spraying with an inexpensive sand-blasting siphon gun was a better application method). One coat was brushed on the roof and two everywhere else. The inside of my kiln was now grey and I was eager to see what the results would be.
The very next firing consumed only 23 gallons of LPG. The second used 21 and the third was down to 19! That was my most efficient fuel usage with subsequent firings averaging around 23 gallons, a 33% decrease in fuel consumption.
A further and unexpected advantage was the effect on my glazes. They seemed richer and more mature, presumably because of the HUC reflectivity similar to the glaze effects I remember getting in hard brick kilns back in the 50s. HUC reflects infrared heat to the ware. In the transfer of radiant energy, the measurement benchmark is the “black body”. A total black body is a substance that absorbs all the radiant energy falling upon it. Such a substance also radiates heat energy at the maximum rate possible by virtue of its temperature. The ability to absorb and radiate heat energy is known as emissivity and in a perfect black body is given as the value of one (1). The emissivity of silicon carbide at 2000F. is approximately 0.92 in contrast to insulating firebrick emissivity values which range from 0.5 to as low as 0.2.
Park Chemical has since sold the rights to MICA Industries of Michigan and they have taken over production producing both a commercial grade of HUC and another for studio potters called CGHUC (Ceramic Grade). I think this coating is well worth considering especially for potters wanting to wood-fire and/or salt in IFB constructed kilns. Recent experiments with salt/soda vapor firing have demonstrated the viability of a salt-soda kiln made with IFB (insulating bricks). Hard bricks consume so much fuel and I think a coating like CGHUC offers significant protection to soft bricks and their use as a coating in salt kilns is definitely worthwhile.
For example, last year Barney Knight of Sedalia, Missouri and some friends built a wood-fired MFT kiln with recycled K-23s. They coated the interior and kiln furniture with CGHUC, (Ceramic Grade Heat Unity Coating) and have been successfully salting with little evidence of breakdown in the IFB.
Earlier tests done at Western Oregon State College by Don Hoskisson showed uncoated K-23s and K-26s holding up pretty well in strong salting environments if not adjacent to salt dumping area. If a salt kiln can be built with IFBs the firing cost can be reduced by a factor of four compared with hard brick construction. Working evidence from Knights wood fired salt kiln clearly demonstrates that K-23 construction coated with CGHUC is a viable alternative to hard brick for salting atmospheres. ITC Refractory Coatings
Recently I became acquainted with Feriz and Alice Delcic at International Technical Ceramics in Florida and discovered they had developed a group of refractory coatings that held promise for a variety of purposes. The ITC coatings include a paste that repairs cracks and missing chunks in both fiber and soft brick, a special coating for metal elements ITC 213, and ITC 296A which is used in conditions where a pure, dense surface is desired. ITC 100 is the basic all-purpose coating that can be applied over almost any refractory surface including electric kilns and elements!
ITC 100 is applied on the interior surface of the kiln and after firing to set it, may be followed by a coating of ITC 296A making an complete isolation barrier. Normally, the 296 coating is not required except for a more dense and pure barrier. For protection of elements they have developed ITC 213 which is designed to coat metal. This effectively prevents element deterioration even in reduction conditions. It is best if the elements are new, dipped in the ITC 213 mixture, allowed to dry and then installed. ITC claims their coatings can be used as a protective coating even on fiber surfaces significantly reducing the small particle hazard of ceramic fiber.
Unlike CGHUC the ITC coatings are non-conductive and it is that quality that led me to experiment with coating the inside of an electric kiln to see if it could be a viable solution to electric reduction without undue deterioration of the elements.
I have long desired a small kiln to test reduction glazes at C-10 levels. Since there are many small electric kilns on the market I wanted to see if there might be a way to use one and add gas as a reducing agent. I chose gas because it can be accurately metered into the small kiln environment.
Conventional wisdom and actual practice suggest that reduction atmospheres are deleterious to and drastically shorten the life of common elements typically found in electric kilns designed for the hobbyist or studio potter. These elements are usually made of some alloy of iron and aluminum (Kanthal) or the older nichrome. When heated in normal neutral or oxidizing atmospheres they form a somewhat protective coating of oxidized alumina which if subjected to reduction reverts to the metal and allows the element to diminish in size and can actually spall off layers of element material. If an electric kiln is subjected to reduction, usually by adding carbonaceous material, it is a good idea to follow up with one or more oxidation firings to rebuild the oxidized coating. This is not necessary, however, if the kiln has been coated with the ITC 100. There have been many attempts (even commercial) to produce reduction by introducing mothballs, coal, wood, paper and vegetable oil. All work to some degree, but the uncoated element life is inevitably shortened and increases the firing cost considerably.
My first attempt exploring the effects of reduction on elements in a small test kiln was at the request of Adrian Fabriano who produces miniature pots fired to cone 10 reduction. Her first kiln was set up so a simple 1/4 pipe could introduce propane gas as a reducing agent in the bottom of the kiln during a firing. An opening (1-1/2) was made in the center bottom (to introduce the gas) and another in the center of the lid for exhaust. At 1400F propane will safely ignite and the resultant flame can be useful for added heat. The idea was to simply let the gas combust in the kiln chamber. Normally, the gas is not introduced until 1650F when body reduction might be desired or for copper reds. The atmosphere was monitored by OXYprobe and the gas metered with a simple ball valve. More control was later obtained by adding a regulator and changing the pipe to a simple burner. My LP supplier suggested an inexpensive rattail burner that I modified by mounting it on a base so it could fire vertically. With an actual burner the additional heat shortened firing time and provided the desired reduction atmosphere. Fabriano found that she could fire 10 to 12 times before she had to change elements. This probably could have been extended by intermittently firing the kiln without the reduction to re-oxidize the elements.
To test the effectiveness of the ITC coatings I purchased a new AIM electric kiln made in Corvallis, Oregon. It is their smallest design measuring about one cubic foot in volume. I prepared it by first drilling a burner port in the bottom and an exhaust flue in the top. Both are simple, round holes 1-1/2 in diameter. Next I mixed the ITC100 with water as directed and sprayed the mixture on all interior surfaces. I fired to red heat and after cooling mixed and sprayed the ITC 296A coating.
The little AIM kiln routinely fires to cone 10 reduction in a six hour firing with this protocol: pre-bisqued tiles or small works are fired to 1650F on high setting in three hours using electric elements alone. The small burner is then lighted with a pressure (bottle LPG) of 2-1/2 psi. The OXYprobe indicates .55 to .58 on the atmosphere setting. Three hours later cone nine is down with ten bending. Copper reds are routine. I occasionally spray in a saturated salt/soda solution for a particular effect. If set up in a closed studio it is important to vent even if not reducing. My studio is quite a large space and I simply turn on an exhaust fan built into an adjacent wall. I dont like most of the commercial venting devices because they are costly and move too much air in my opinion. The simplest (and cheapest) venting device Ive seen is one developed by Mel Jacobson in Minnesota. He places a 4 steel pipe, both ends open, next to his kiln. Brackets hold it vertically about a foot off the floor and it goes up and out the roof . Near the top of his kiln and out of the way of the lid hinge mechanism a one inch hole is drilled. This hole vents the gases out and through a one inch steel pipe connected to the larger pipe. Mel has the small pipe angling up at a 45 angle to facilitate the venting thats it, and it works. One note: the top of the 4 pipe can be turned 90 to keep rain out.
When I bought the AIM kiln I ordered an extra set of elements and coated them with ITC 213. After twenty firings I still reach cone 010 in three hours electrically and so far no apparent deterioration of the elements is observed so I have yet to replace the old elements with the new ones to test the ITC 213 metal coating. It may be awhile.
The ITC coatings seem just as promising as a protective coating for IFBs in a salt/soda environment. At Hoskissons new ceramic facility at WOSC we recently built a small salt kiln entirely with K-23s. The inside is sprayed with one coat of ITC 100. We used a cheap sand blasting sprayer to do the job because it handles the mixture without clogging. All of the kiln furniture was coated as well. The kiln is well sealed because of the coatings. Firings are showing very little deterioration of the kiln structure using salt for sodium vapor. Salt is introduced with a length of angle steel loaded with salt; about 15 inches is inserted and rotated to drop the salt in front of the burners.
The coatings function, according to ITCs Feriz Delcic, as an isolator rather than as an insulator. They set up a protective layer and reflect the radiant heat pretty efficiently. No spalling has been observed so far. Common cordereite/mullite shelves designed for cone six electric kilns were coated and found to be fully functional at cone 10 in reduced salting conditions. In order to see how well these coatings protect I tested a matched pair of 5/8 mullite shelves in the East Creek anagama where cone 14 is routinely achieved. One was coated with ITC 100 and the other left uncoated. Each supported a 12 lb load set on a 10 span. After 72 hours in the hottest part of the anagama the uncoated shelf now has a warped deflection of 1/2 versus 1/8 on the coated shelf.
While the anagama firing was in progress I decided to see how well the ITC coating could protect non-refractory material. I cut a piece of 3/4 thick, wooden flake board about a foot larger in size than the main stoking port and brushed on a coat of ITC 100. Cone 14 was bending and we propped the board across the front of the port. Ten minutes later the back of the board was still cool! After twenty minutes it was removed revealing gases had bubbled the coating and it was only then beginning to burn.
For me a raku kiln needs to be light in weight and easily portable. 55 gallon drums lined with fiber are too bulky and not easily lifted. Having used ceramic fiber riser sleeves as insulating liners in kiln stacks I felt they held promise for raku kiln constructionespecially since they are available in a variety of stock sizes. I ordered two from Fire Brick Supply Co., each measuring one foot in height and having an inside dimension of 18. I chose sleeves with a wall thickness of 2, but I think with the ITC coating 1-1/2 is probably sufficient. The kiln is constructed by simply stacking one cylinder on the other and wrapping the pair with flexible expanded metal. I used steel, but aluminum would work. I brazed on three pipe clamps that tighten with a screw driver so the expanded metal screen could be snugged tight. Two handles made of 1/4 steel rod were added for lifting. The top is a slab of ceramic fiber board (M-board) and the kiln sits on a foundation of bricks which may be hard or soft. This protects whatever the foundation sits on and provides an opening for the burner port that is another riser sleeve 4 in diameter. The kiln interior, including the shelves and stilts, is sprayed with ITC 100. In forty minutes the loaded kiln reaches 1800F.
What makes this kiln truly portable is the liquid withdrawal burner designed to use LPG in liquid rather than vapor form. This means that a simple LPG bottle, barbecue style holding five gallons, can be used without freezing up and losing pressure. Most propane burners, weed burners and the like use LPG in vapor form and in order to maintain enough Btus draw faster than vapor boils. Pressure falls and the tank freezes up. The liquid burner, however, is designed with a sealed chamber where the LPG is vaporized in the burner just before it gets to the orifice. Very simple, and very effective. It requires only a liquid withdrawal regulator, high pressure hose and a dip-tube valve installed on the tank. I sometimes use a standard vapor tank and simply turn it upside down when I want to draw off liquid. That way I can use it for vapor in other applications. I dont recommend this, but I am convinced it is safe for the small five gallon bottles.
One of the main objections I have with fiber kilns is the hazardous potential of breathing fiber particles when loading or working around them. ITC 100 sprayed over the inside hardens the surface preventing the fibers from breaking down and becoming a permanent part of ones lungs. With ITC 100 the kiln will likely fire more evenly and efficiently because the coating reflects the heat and the hot face of the fiber insulation will be cooler. Less fuel is needed to reach temperature. I suggest spraying a coating of ITC 100, firing the kiln to normal temperature and then spraying with a coating of ITC 296A. The total thickness is less than 1/8. In my opinion it is a major improvement on a fiber kiln and makes them much more acceptable.
A few weeks ago, I had the pleasure of attending the Potters Council Handbuilding workshop in Atlanta, Georgia. As usual, the workshop was loaded with fantastic presenters and I came away with lots of new ideas for the studio. I also had the pleasure of working with a few of the artists to shoot some video to share with Ceramic Arts Daily readers! Click here to read more and watch the video demonstration
Ceramics 1 and 2 student works have been uploaded to the Flickr gallery on the left. The works in this gallery are a compilation of the strongest work produced this year, enjoy. Below are a few images from the gallery.
Kaela Jackson

Nina Whitetree

Mayo Ishida

Noura Saddi
This work comprises some of the many designs that were completed by the Ceramics 1 classes at Topeka West High School as instructed by my student teacher Ms.Roose during the spring semester of 2010. The assignment involved the process of incising and carving relief from 6 by 6 inch clay tiles using tessellation (def. cover (a plane surface) by repeated use of a single shape,without gaps or overlapping.) as the design template. The students used a single cone 6 glaze to realize the surface after initial bisque firing. The outcome was productive and successful, both technically and aesthetically. The visual discourse of this assignment also aligned with the cross-curricular teaching of mathmetics, via the tessellation templates. A wonderful exercise for discussing the qualities of repetition and pattern. I have posted images to the Flickr widget bar at the left and will include a few images in the blog post.


I’ve used for years under the name “Grebanier’s Black”. I found it in Joseph
Grebanier's book on Chinese Stoneware Glazes.
The recipe:
Black iron oxide    = 43
Manganese dioxide = 18
Cobalt oxide            = 15
Nickel oxide            = 15
Chromic oxide         =  9


Grind it thoroughly in a mortar for a long time. On its own, it's good for
dense black brushwork, or for labelling on glaze sample tests


More recently, I've been using this black mix as a surface wash over carved
work, with the addition of 50 parts of Frit 3134 to make it stick, and 3
parts of bentonite to try and keep it in suspension. The result has been a
delightful semi-matt dense black which doesn't obscure the details of a
carving. Just mix it very thin and watery, and flood it on with a soft
brush.


Mostly it has been coming out exactly as I want it (cone 10 reduction), but
just sometimes the surface has been rough and scratchy. Haven't resolved
this problem yet, but a temporary fix has been to add a very light mist of a
clear glaze, sprayed over the black, to make the surface a bit more fluid
when hot. Worth a try.


Roger Graham, near Gerringong, Australia


http://members.optusnet.com.au/~rogergraham


------------------------------


------------------------------


Date:    Sun, 29 Jun 2003 20:29:13 +0200
From:    Alisa Clausen <aliskin@MAIL.DK>
Subject: Re: Waxing Brown Glaze Recipe/Black Mix


Behrens Black mix is
3.1 Cobalt oxide
0.7 Chrome ox.
3.7 RIO
1.2 Manganese Diox.
1.3 Nickel ox.


lots of hazardous stuff, but nice and black.  Like Snail says, I hardly mix
these tiny percents. I make it more or less by the teaspoon full as follows
down the list
3, 1/2, 4, 1 and 1.


regards from Alisa


> At 10:41 AM 6/28/03 EDT, you wrote:
> >-can anyone tell me which oxide is the black?
>
>
> You usually get a better black with a mixture of oxides.
> Iron is cheap, so use some of that, but add a lot of
> chrome, maybe some manganese, and spike it with a bit of
> cobalt. Without the cobalt, you tend to get brownish
> blacks. The exact proportion isn't critical, but Chappell
> gives a few recipes:
>
> 64 Chrome oxide
> 36 Red Iron Oxide
>
> OR
>
> 54 Chrome Oxide
> 26 Red Iron Oxide
> 15 Manganese Dioxide
> 5 Cobalt Oxide
>
> That first recipe will almost certainly be a bit brown,
> but easy and inexpensive. The second is likely to be
> a truer black.
il
source: http://www.bigceramicstore.com/information/MixingGlazes.htm
|
Mixing Dry Glazes
|